Crafting a Timeless Gift with the Baby Carriage Keepsake SVG
There is something profoundly special about holding a physical memento from a baby's earliest days. In an era dominated by digital photos and cloud storage, a tangible, handmade object carries a weight that pixels simply cannot match. The Baby Carriage Keepsake SVG offers crafters a unique opportunity to bridge this gap, transforming flat sheets of paper into a charming three-dimensional centerpiece. Whether you are designing a gift for a baby shower, creating nursery décor, or building a small business inventory, this project stands out for its blend of nostalgia and utility. However, diving into 3D papercraft without a clear strategy can lead to frustration. By understanding the nuances of this specific design, you can avoid common pitfalls and ensure your final creation is as sturdy as it is beautiful.
Understanding the Design and Its Potential
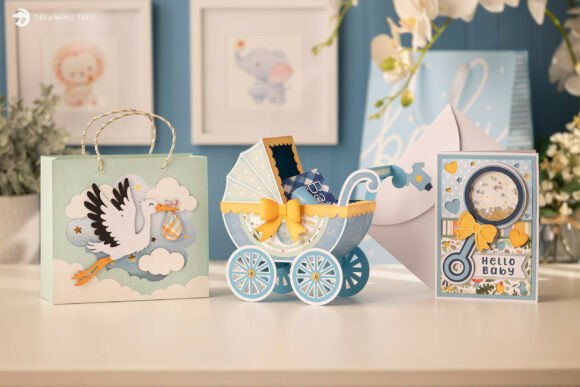
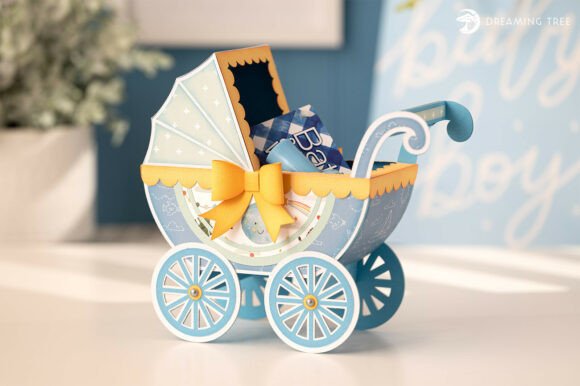
At its core, the Baby Carriage Keepsake SVG is more than just a cutting file; it is a structural blueprint for a functional art piece. Unlike simple silhouette cutouts, this design is engineered to fold, slot, and adhere into a box-like carriage capable of holding small gifts, notes, or precious keepsakes like a lock of hair or a hospital bracelet. The dimensions—approximately 7.75 inches in height, 11 inches in width, and 3.25 inches in depth—make it substantial enough to be a focal point on a mantle or gift table, yet compact enough to fit within standard crafting constraints.
Many beginners overlook the versatility of this format. Because it is provided strictly in SVG format, it offers unparalleled compatibility with all major SVG-ready cutting machines and software. This universality means you aren't locked into a specific brand ecosystem. Furthermore, the inclusion of a PDF legend is a critical, often underappreciated feature. It serves as your map, helping you identify pieces and coordinate paper colors before you ever send a file to your machine. Ignoring this legend is the first step toward a confusing assembly process.
Common Mistakes in Material Selection
The most frequent error crafters make when approaching the Baby Carriage Keepsake SVG is treating all cardstock as equal. The structural integrity of a 3D project relies entirely on the weight and grain of your paper. The design specifications call for specific quantities of materials, such as three sheets of 12x12 Blue Sky Cardstock and two sheets of Snowy White. Substituting these with lightweight scrapbook paper or flimsy printer paper will result in a carriage that sags, loses its shape, or fails to hold any weight inside.
Conversely, using paper that is too thick can be equally detrimental. If your cardstock exceeds the recommended weight for your machine's blade, you risk incomplete cuts or tearing during the weeding process. This leads to jagged edges that ruin the clean lines essential for a professional look. A better approach is to stick to the recommended 65-80 lb cardstock range. For the decorative elements, such as the Beehive, Fountain, and Honey Bear cardstocks listed in the supply list, ensure they have a similar weight to the base colors to maintain uniform folding behavior.
Another oversight involves the patterned papers. The design calls for specific sizes, including 8.5x11 sheets for patterns like Light Green and White. Beginners often try to force 12x12 patterned sheets into the workflow without checking the layout. While you can certainly use larger sheets, failing to optimize your cutting mat space can lead to unnecessary waste. Always arrange your digital mats to match the physical sheet sizes you have on hand to maximize efficiency.
Navigating Sizing and Scaling Issues
One of the greatest advantages of vector files is the ability to resize, but this freedom comes with a warning. The Baby Carriage Keepsake SVG is designed with 12x12 cutting machines in mind. While you can resize the project to fit your needs, doing so changes the physics of the assembly. If you scale the design down significantly, the tabs used for gluing may become too small to handle or adhere properly. If you scale it up without increasing the paper weight, the structure may become too heavy for the joints to support.
Before resizing, consider the intended use. If this is a favor box for guests, a smaller size works well. If it is a main gift container, the original dimensions (7.75" H x 11" W x 3.25" D) are ideal. If you must change the size, do so proportionally and test a single prototype with scrap paper first. This "dry run" allows you to verify that the slots still align and the folds crisp correctly before committing your premium cardstock.
Assembly Pitfalls and How to Avoid Them
Even with perfect cuts, the assembly phase is where many projects falter. The urge to rush through gluing is strong, especially when you have multiple layers to adhere. However, patience is the most important tool in your kit. The design relies on precise alignment; if one side of the carriage is glued slightly higher than the other, the wheels will not sit flat, and the canopy may look skewed.
A common mistake is neglecting the use of foam squares. The supply list explicitly mentions ink, foam squares, and rhinestones. Foam squares are not just decorative; they add dimension and stability between layers, preventing the paper from warping over time. Skipping them to save a few cents results in a flat, less impressive finish. Similarly, applying liquid glue indiscriminately can cause the paper to warp or bleed. Use a fine-tip applicator for control, or rely on double-sided tape for cleaner bonds.
For those who feel unsure about the folding sequence, the included step-by-step video tutorial is an invaluable resource. Many users download the file and immediately start cutting, only to get stuck halfway through assembly. Watching the tutorial before you begin cutting provides a mental roadmap of the process. It clarifies which pieces interlock and the order in which layers should be applied, saving you from having to pry apart dried glue later.
Maximizing Value for Professionals and Hobbyists
For entrepreneurs and small business owners, the Baby Carriage Keepsake SVG represents a scalable product opportunity. However, consistency is key. If you plan to sell these as finished goods or kits, document your material sources. Using different brands of "White" cardstock can lead to slight color variations that look like errors to a paying customer. Standardize your inventory to ensure every unit looks identical.
Educators and workshop leaders should also note the complexity level. While accessible to beginners, the multi-layer nature of this project requires fine motor skills. When teaching this design, pre-kitting the materials—sorting the Blue Sky, Snowy White, and patterned pieces into individual bags—can streamline the class experience and prevent students from feeling overwhelmed by the number of components.
Ultimately, the success of your project hinges on preparation. Check your blade sharpness, calibrate your machine for the specific cardstock weight, and lay out your PDF legend alongside your cut pieces. By respecting the design's requirements and avoiding the temptation to cut corners on materials or assembly time, you transform a simple digital file into a cherished heirloom. The Baby Carriage Keepsake SVG is designed to be meaningful; with the right approach, your handmade version will carry that meaning forward for years to come.